
The Best Fluffy Pancakes recipe you will fall in love with. Full of tips and tricks to help you make the best pancakes.
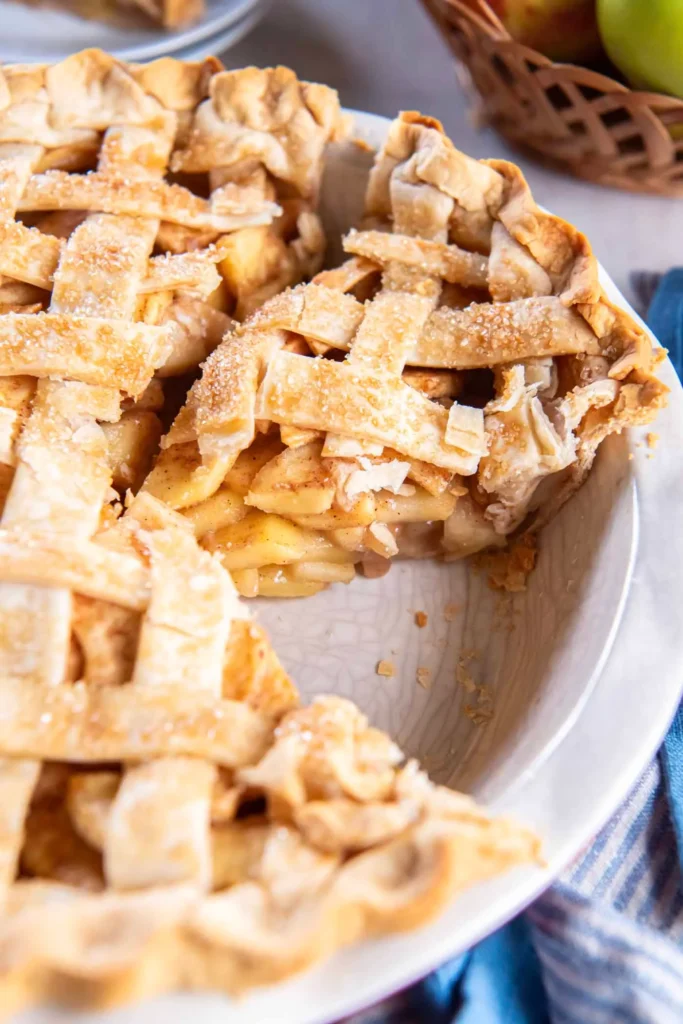
Every time I bake this homemade apple pie, my kitchen fills with the cozy aroma of cinnamon, butter, and sweet baked apples. It’s one of those recipes that instantly makes the whole house feel warm and inviting, and somehow everyone seems to appear in the kitchen asking when it’ll be ready.
Jump to RecipeI love this recipe because it keeps things simple without sacrificing flavor. The filling stays perfectly tender instead of turning mushy, and the buttery homemade crust bakes up beautifully crisp and flaky.
Quick Recipe Info
Whenever I’m planning dessert for a family dinner or holiday gathering, this pie is always my first choice. It comes together with pantry staples, and the results never disappoint.
- Prep Time: 35 minutes
- Cook Time: 55 minutes
- Total Time: 1 hour 30 minutes (plus 1 hour chilling time)
- Servings: 8 slices
- Calories: Approximately 430 per serving
- Protein: 4g
- Gluten-Free: No
- Dairy-Free: No
- Vegan: No
- Meal Prep Friendly: Yes
Why You’ll Love This Recipe
I’ve tried plenty of apple pie recipes over the years, but I keep coming back to this one because it’s dependable and consistently delicious. It has that classic homemade taste that reminds me why baking from scratch is always worth the extra effort.
- Buttery, flaky homemade pie crust
- Packed with tender cinnamon-spiced apples
- Beginner-friendly with simple ingredients
- Great for holidays and family gatherings
- Can be prepared ahead of time
- Freezes beautifully after baking
- Delicious served warm or cold
- Easy to customize with your favorite apples and spices
Ingredients You’ll Need
I always recommend gathering and measuring everything before you begin. Having the ingredients ready makes assembling the pie much smoother, especially when working with pie dough.
All-Purpose Flour – 2½ cups
This forms the base of the homemade pie crust. I use regular all-purpose flour because it creates a tender crust that’s sturdy enough to hold the juicy apple filling without becoming tough.
Salt – 1 teaspoon
A little salt balances the sweetness and enhances the buttery flavor of the crust. Don’t skip it—it makes the overall flavor much more balanced.
Granulated Sugar – 1 tablespoon (for the crust)
Just a small amount adds a subtle sweetness and helps the crust brown beautifully while baking.
Unsalted Butter – 1 cup (2 sticks), very cold and cubed
Cold butter is the secret to flaky layers. As it melts in the oven, it creates tiny pockets of steam that produce that irresistible buttery texture.
Ice Water – 6 to 8 tablespoons
Ice-cold water brings the dough together without melting the butter. Add it gradually until the dough just holds together when pressed.
Apples – 6 medium (about 2½ pounds), peeled, cored, and sliced
I like using a mix of Granny Smith and Honeycrisp apples. The tart apples balance the sweetness, while the sweeter varieties become wonderfully tender without falling apart.
Brown Sugar – ½ cup
Brown sugar adds a richer, caramel-like sweetness that pairs perfectly with baked apples.
Granulated Sugar – ¼ cup
This brightens the filling and helps create the perfect balance of sweetness.
Ground Cinnamon – 2 teaspoons
Cinnamon gives the pie its classic warm flavor. Fresh cinnamon has a much stronger aroma than older spices, so it’s worth checking yours before baking.
Ground Nutmeg – ¼ teaspoon
Just a pinch deepens the flavor without overpowering the apples.
Lemon Juice – 1 tablespoon
Fresh lemon juice keeps the apples from browning and adds a subtle brightness that keeps the filling from tasting overly sweet.
Cornstarch – 3 tablespoons
Cornstarch thickens the apple juices into a silky filling that slices neatly instead of running across the plate.
Vanilla Extract – 1 teaspoon
Vanilla rounds out all the warm spices and gives the filling a richer homemade flavor.
Unsalted Butter – 1 tablespoon
A few small pieces of butter placed over the filling melt into the apples and create an extra luxurious texture.
Egg – 1 large
Beaten with a tablespoon of water, the egg wash gives the top crust a gorgeous golden finish.
Coarse Sugar – 1 tablespoon (optional)
Sprinkling coarse sugar over the crust before baking adds sparkle and a delicate crunch that makes the finished pie look bakery-worthy.
Optional Add-Ins
If I want to change things up slightly, these additions work beautifully without taking away from the classic flavor.
- ½ teaspoon ground cloves for extra warmth
- ½ teaspoon apple pie spice
- ¼ teaspoon ground ginger
- ½ cup chopped toasted pecans or walnuts
- 2 tablespoons caramel sauce drizzled over the apples before adding the top crust
Tools For This Recipe
Having the right tools makes homemade pie much less intimidating. I use these every time I bake apple pie because they help create consistent results.
As an Amazon Associate, I earn from qualifying purchases.
- 9-inch Glass Pie Dish
- Pastry Cutter
- Marble Rolling Pin
- Apple Peeler and Corer
- Silicone Pastry Brush
- Mixing Bowls Set
- Cooling Rack
How to Make It
I always make the pie dough first so it has plenty of time to chill while I prepare the filling. Taking your time during each step makes a noticeable difference in the final texture.
Step 1: Prepare the Pie Dough
In a large mixing bowl, whisk together 2½ cups all-purpose flour, 1 teaspoon salt, and 1 tablespoon granulated sugar. Cut in 1 cup cold cubed butter until the mixture resembles coarse crumbs with pea-sized butter pieces still visible.
Slowly drizzle in 6 to 8 tablespoons ice water, one tablespoon at a time, mixing gently until the dough just comes together. Divide it into two discs, wrap each tightly, and refrigerate for at least 1 hour.
Step 2: Make the Apple Filling
Peel, core, and slice 6 medium apples, then place them in a large bowl. Add ½ cup brown sugar, ¼ cup granulated sugar, 2 teaspoons cinnamon, ¼ teaspoon nutmeg, 3 tablespoons cornstarch, 1 tablespoon lemon juice, and 1 teaspoon vanilla extract.
Toss everything until every apple slice is evenly coated. Let the mixture sit for about 10 minutes so the apples begin releasing their juices while the flavors blend together.
Step 3: Roll Out the Bottom Crust
Lightly flour your work surface and roll one chilled dough disc into a circle about 12 inches wide. Rotate the dough frequently to keep it from sticking and maintain an even thickness.
Carefully transfer the dough into a 9-inch pie dish, gently pressing it into the bottom and sides without stretching it. Trim any large overhang, leaving about an inch around the edges.
Step 4: Fill the Pie
Pour the prepared apple filling into the crust, spreading it evenly so the apples are slightly mounded in the center. This helps compensate for the filling settling as it bakes.
Dot the apples with 1 tablespoon unsalted butter, placing small pieces across the top so they melt evenly into the filling during baking.
Step 5: Add the Top Crust
Roll the second dough disc into another 12-inch circle and carefully lay it over the apples. Trim any excess dough, then fold and crimp the edges to seal both crusts together.
Cut 4 to 5 small slits in the center to allow steam to escape. These vents help keep the crust crisp while preventing the filling from bubbling over.
Step 6: Brush and Bake
Whisk 1 large egg with 1 tablespoon water, then brush the entire top crust evenly. Sprinkle with 1 tablespoon coarse sugar if using for extra crunch and sparkle.
Bake at 425°F (220°C) for 20 minutes, then reduce the oven temperature to 375°F (190°C) and continue baking for another 35 to 40 minutes, or until the crust is deep golden brown and the filling is bubbling through the vents.
Step 7: Cool Before Slicing
Remove the pie from the oven and place it on a cooling rack. Let it cool for at least 3 hours before slicing so the filling has time to thicken properly.
Waiting can feel like the hardest part, but it’s well worth it. The slices hold together beautifully, and every bite is packed with perfectly tender apples surrounded by a flaky, buttery crust.
Nutrition Breakdown: What Makes This Recipe So Filling and Satisfying
One thing I appreciate about homemade apple pie is that every slice feels genuinely satisfying. The combination of fresh fruit, buttery pastry, and warm spices creates a dessert that’s comforting without needing anything overly complicated.
| Nutrient | Amount Per Serving |
|---|---|
| Calories | 430 |
| Protein | 4g |
| Carbohydrates | 60g |
| Fat | 20g |
| Fiber | 4g |
| Sugar | 30g |
The apples are the nutritional star of this recipe, providing natural fiber that makes each slice more filling than many store-bought desserts. Fiber also helps balance the sweetness and gives the filling its hearty texture.
Substitutions and Variations
One of my favorite things about this recipe is how forgiving it is. Even if you’re missing an ingredient, there are several simple swaps that still produce a delicious homemade pie.
Instead of Granny Smith Apples
Honeycrisp, Braeburn, Pink Lady, Jonagold, or Fuji apples all work beautifully. I actually enjoy combining two different varieties because it creates a more complex flavor and a better texture.
Instead of Cornstarch
Use 3 tablespoons all-purpose flour or 2 tablespoons tapioca starch. Flour creates a slightly cloudier filling, while tapioca starch keeps it glossy and beautifully thick.
Instead of Brown Sugar
You can replace it with an equal amount of granulated sugar if that’s what you have available. The filling will taste a little lighter and won’t have quite as much caramel richness.
Instead of Homemade Pie Crust
A quality refrigerated pie crust works perfectly on busy days. You’ll save time while still enjoying a homemade apple filling that tastes fresh and comforting.
Add a Crumble Topping Instead
Skip the top crust and sprinkle on a mixture of ¾ cup flour, ½ cup brown sugar, ½ teaspoon cinnamon, and 6 tablespoons cold butter for an easy Dutch apple pie variation.
Meal Prep Tips
I often prepare this pie in stages, especially before holidays. Breaking the work into smaller steps makes baking feel much more relaxed, and the final pie tastes just as fresh.
The pie dough can be made up to 3 days ahead and stored tightly wrapped in the refrigerator. You can also peel and slice the apples a day in advance by tossing them with the lemon juice and storing them in an airtight container.
If you’ve already baked the pie, let it cool completely before covering it. A pie carrier or airtight cake container works best because it protects the flaky crust without trapping too much moisture.
For easy serving, I like slicing the pie before storing leftovers. Individual slices are convenient for quick desserts and are easy to reheat whenever a craving strikes.
Easy Variations
After making this recipe so many times, I’ve found a few fun ways to change it up while keeping that classic homemade apple pie flavor everyone loves.
Caramel Apple Pie
Drizzle ¼ cup caramel sauce over the apple filling before adding the top crust. The caramel melts into the apples and creates an extra decadent dessert.
Dutch Apple Pie
Replace the top crust with a buttery cinnamon crumble topping. It bakes into a crisp, golden layer that contrasts beautifully with the soft apples underneath.
Apple Cranberry Pie
Mix 1 cup fresh or frozen cranberries into the apple filling. Their tart flavor adds brightness and makes this version especially nice during the holiday season.
Maple Apple Pie
Replace half of the brown sugar with ¼ cup pure maple syrup. The maple flavor pairs wonderfully with cinnamon and gives the filling an even cozier taste.
Extra Cinnamon Spice Version
Increase the cinnamon to 1 tablespoon and add ¼ teaspoon ground cloves plus ½ teaspoon ground ginger for a warmer, bakery-style spice blend.
Serving Ideas
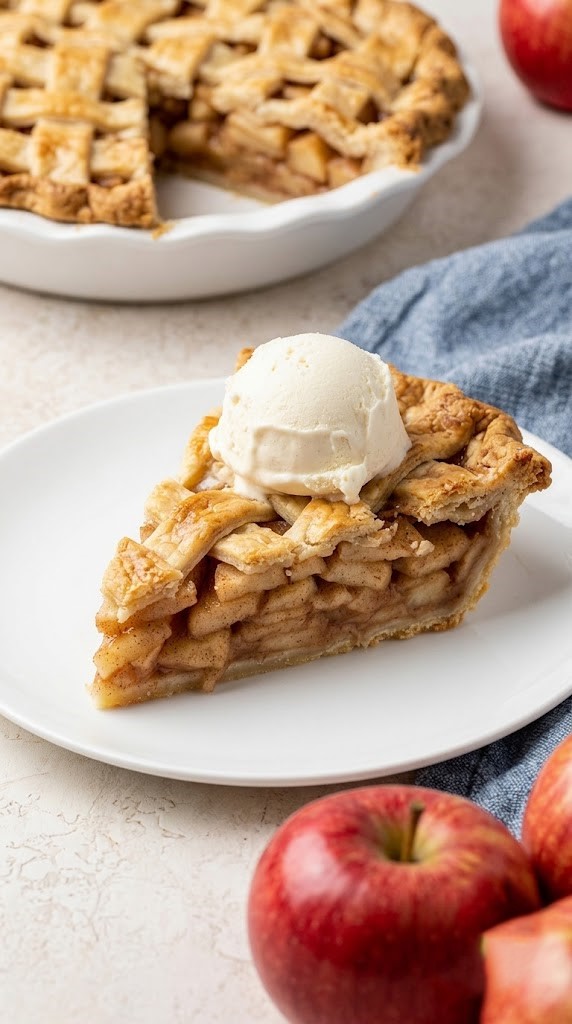
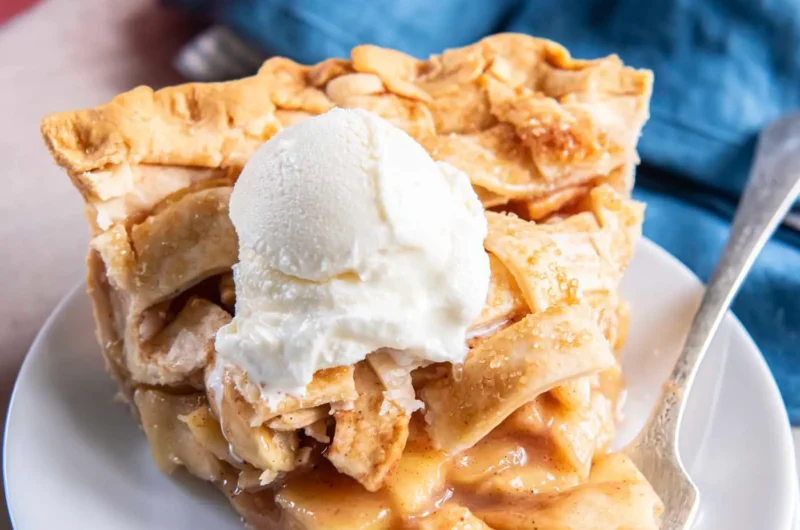
I love serving this pie slightly warm because the filling becomes incredibly soft and fragrant while the crust stays crisp around the edges. It’s one of those desserts that feels special without requiring much extra effort.
A scoop of vanilla ice cream melting over a warm slice is always my first choice. Fresh whipped cream, salted caramel sauce, or a drizzle of warm caramel are equally delicious if you’re serving guests.
For brunch gatherings, I sometimes pair a small slice with coffee and fresh fruit. It’s also wonderful alongside hot apple cider during the fall or a simple cup of black coffee after dinner.
Storage and Leftovers
One of the best things about homemade apple pie is that it keeps surprisingly well. In fact, I think the flavors become even better after they’ve had a little time to settle together.
Refrigerator Storage
Cover the completely cooled pie loosely with foil or transfer slices to an airtight container. Store in the refrigerator for up to 5 days while keeping the crust as crisp as possible.
Freezer Storage
Apple pie freezes exceptionally well. Wrap the whole cooled pie or individual slices tightly in plastic wrap followed by aluminum foil, then freeze for up to 3 months.
Thaw overnight in the refrigerator before reheating for the best texture.
Reheating Instructions
Warm individual slices in a 350°F (175°C) oven for about 10–15 minutes to crisp the crust again. The microwave works for convenience, but the oven keeps the pastry much flakier.
Easy Homemade Apple Pie Recipe
Course: DessertsCuisine: AmericanServings
8
servingsPrep time
35
minutesCooking time
55
minutesCalories
430
kcalThis Homemade Apple Pie features a buttery, flaky crust filled with tender apples coated in a warm cinnamon-spiced filling. It’s an easy, classic dessert that’s perfect for holidays, family gatherings, or anytime you’re craving a comforting slice of homemade pie.
Ingredients
For the Pie Crust
2½ cups all-purpose flour
1 teaspoon salt
1 tablespoon granulated sugar
1 cup (2 sticks) unsalted butter, very cold and cubed
6–8 tablespoons ice water
For the Apple Filling
6 medium apples (about 2½ pounds), peeled, cored, and thinly sliced
½ cup brown sugar
¼ cup granulated sugar
2 teaspoons ground cinnamon
¼ teaspoon ground nutmeg
3 tablespoons cornstarch
1 tablespoon fresh lemon juice
1 teaspoon vanilla extract
1 tablespoon unsalted butter, cut into small pieces
For the Egg Wash
1 large egg
1 tablespoon water
1 tablespoon coarse sugar (optional)
Directions
- In a large bowl, whisk together the flour, salt, and sugar. Cut in the cold butter until the mixture resembles coarse crumbs. Gradually add the ice water until the dough comes together. Divide into two discs, wrap, and chill for at least 1 hour.
- In another large bowl, combine the sliced apples, brown sugar, granulated sugar, cinnamon, nutmeg, cornstarch, lemon juice, and vanilla extract. Toss well and let the filling rest for 10 minutes.
- Preheat the oven to 425°F (220°C).
- Roll out one disc of dough into a 12-inch circle and fit it into a 9-inch pie dish.
- Spoon the apple filling into the crust and distribute it evenly. Dot the top with the 1 tablespoon of butter.
- Roll out the second disc of dough and place it over the filling. Trim, seal, and crimp the edges, then cut 4–5 slits in the top crust for ventilation.
- Beat the egg with the water and brush it over the top crust. Sprinkle with coarse sugar if desired.
- Bake for 20 minutes at 425°F (220°C). Reduce the oven temperature to 375°F (190°C) and continue baking for 35–40 minutes, until the crust is golden brown and the filling is bubbling.
- Cool the pie on a wire rack for at least 3 hours before slicing and serving.
Notes
- A mix of Granny Smith and Honeycrisp apples provides the best balance of sweet and tart flavors.
- Keep the butter and water as cold as possible for a flaky crust.
- Allowing the pie to cool completely helps the filling set for cleaner slices.
Common Questions
What Are the Best Apples for Homemade Apple Pie?
I recommend combining tart and sweet apples like Granny Smith and Honeycrisp. The mixture creates a filling that’s flavorful, balanced, and holds its shape after baking.
Can I Make This Ahead of Time?
Absolutely. You can prepare the dough several days ahead or assemble the entire unbaked pie and refrigerate it overnight before baking the next day.
Can I Freeze Apple Pie Before Baking?
Yes. Assemble the pie completely, wrap it tightly, and freeze it unbaked for up to 3 months. Bake directly from frozen, adding about 15–20 minutes to the baking time.
Why Is My Apple Pie Runny?
The filling usually needs either more thickener or more cooling time. Letting the pie cool for at least 3 hours allows the juices to thicken properly before slicing.
Should I Cook the Apples Before Baking?
For this recipe, I don’t pre-cook them. Thinly sliced apples become perfectly tender in the oven while still keeping a little texture.
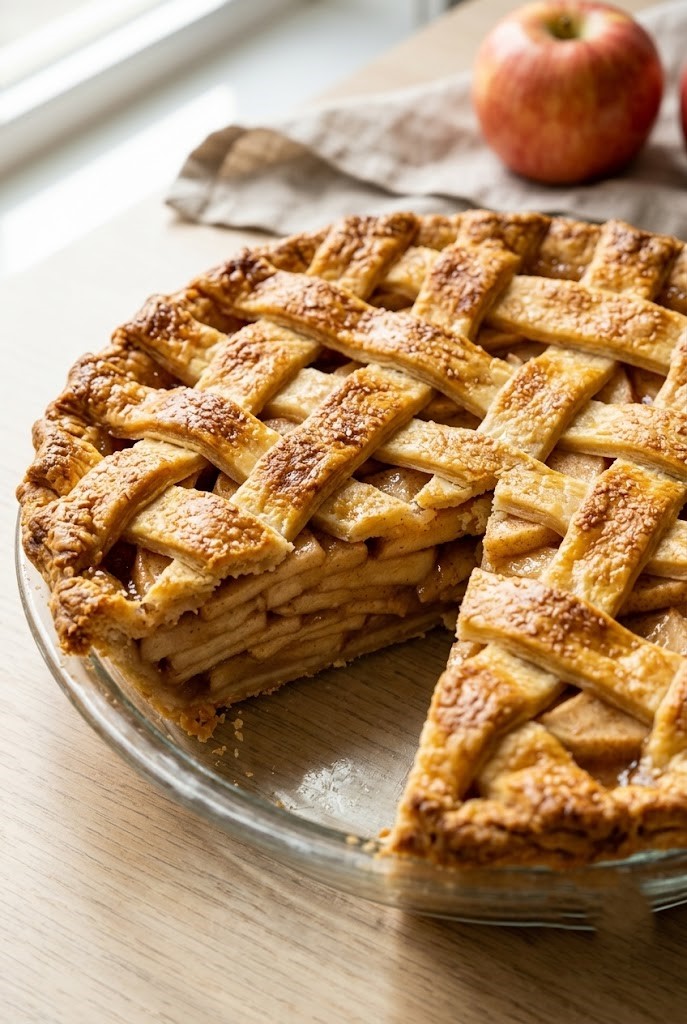
How Do I Keep the Bottom Crust Crisp?
Using a fully preheated oven and baking on the lower oven rack helps the bottom crust cook thoroughly. Glass pie dishes also brown the bottom crust very nicely.
Can I Use Store-Bought Pie Crust?
Definitely. A refrigerated pie crust is a great shortcut when you’re short on time, and the homemade apple filling still delivers wonderful flavor.
Final Thoughts
Homemade apple pie has become one of those recipes I return to year after year because it never goes out of style. Every slice has buttery layers, tender cinnamon-spiced apples, and that comforting homemade flavor that makes everyone ask for seconds. If you’re looking for another comforting homemade dessert after this pie, my Brown Butter Chocolate Chip Cookies are another family favorite.